Stop Gutter Overflow: Contractor Backed Downspout Placement for DIYers
Put downspouts at outside corners and at the low end of every gutter run, spaced roughly every 30 to 40 feet according to standard contractor guidance, with each one dumping water a minimum safe distance away from the foundation, extending further where clay soil or basements increase risk. Slope the gutter toward that outlet at a mild angle to ensure drainage. Get those four numbers right and most drainage problems never happen.
TL;DR: Spacing downspouts every 30 to 40 feet is standard, with additional outlets needed for runs exceeding 40 feet or in complex roof designs. Downspouts should discharge water at least 4 to 6 feet from the foundation, extended further on clay soils or basemented homes. Gutters require a slope of about 1/4 inch per 10 feet to ensure proper water flow toward the outlets and avoid standing water. Proper sizing involves approximately 1 square inch of downspout cross-section per 100 square feet of roof, with larger sizes recommended for heavy rainfall or steep pitches. Correct installation practices include measuring accurately, ensuring proper slope, and avoiding outlet placement over walkways or near foundation cracks.
TL;DR:
Corners come first, every time. An outside corner gives water the shortest path down, which means fewer elbows, fewer joints, and fewer spots where leaves and shingle grit pile up and clog the run. Downspout placement and sizing identifies corners as the preferred location precisely because they cut down on obstructed paths and clog risk. If your roof has four corners and a simple hip design, that’s often your entire placement plan.
From there, the decision gets a little more layered. Here’s the order most contractors actually work through when they walk a roof:
A steep or complex roof with multiple valleys usually needs more outlets than a simple gable, because valleys concentrate runoff into a single gutter section fast. When in doubt, add an outlet rather than stretch a run past 40 feet.
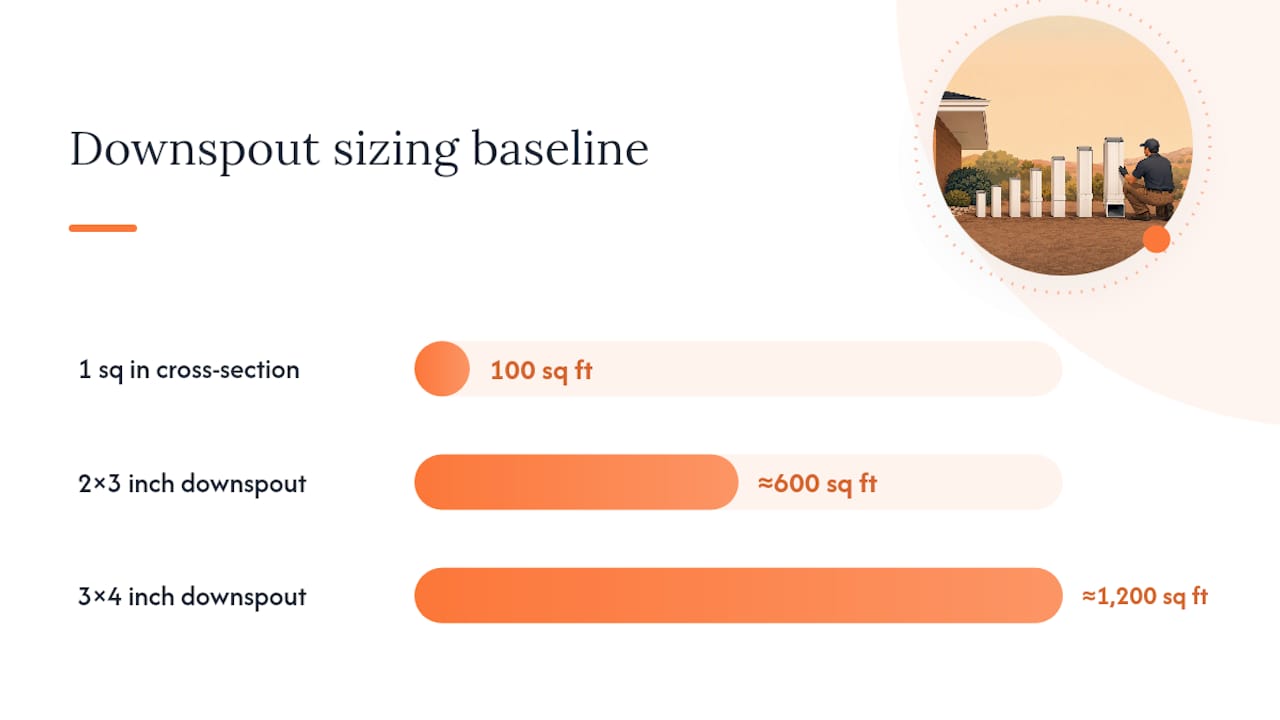
The sizing math is simpler than most homeowners assume: you need roughly 1 square inch of downspout cross-section for every 100 square feet of roof area draining into that outlet, a rule confirmed across contractor guidance as the standard baseline.
Pro Tip: Measure the roof area draining to a single downspout, not the whole roof. A 1,800 square foot roof split across three outlets means each one only handles about 600 square feet, which changes what size downspout you actually need.
Standard sizes break down like this:
Steep roof pitches and high-intensity rainfall both push more water through the system per minute than the square-footage math alone suggests, because water reaches the gutter faster and in a heavier volume. If your area sees frequent downpours or your roof pitch is above 8/12, size up one increment or add a second outlet rather than relying on the bare minimum calculation.
Gutters need roughly a 1/4 inch drop per 10 feet of run toward the outlet, confirmed in a Building America case study on high-performance gutter systems. Some installers work in 1/16 to 1/8 inch per foot, which lands in the same range. Without that pitch, water sits in the trough instead of moving toward the downspout, and standing water is what rots fascia boards and breeds mosquitoes.
Pro Tip: Run a garden hose test after installation. Pour water in at the far end and watch it. If it pools anywhere along the run instead of moving steadily toward the outlet, that section needs a hanger adjustment.
Discharge distance depends on your soil and your foundation type, not a single fixed number. The Building America Solution Center sets 4 to 6 feet as the minimum distance from the foundation, extending to 8 to 10 feet where clay soil, poor grading, or a basement raises the stakes.
On flat or clay-heavy lots, inexpensive splash blocks tend to fail over time, which is why professionals lean toward buried piping for anything beyond a simple, well-drained yard. If you go with buried pipe, put a clean-out fitting near the downspout connection so you can clear debris without digging up the whole line.
A few placement mistakes turn a working gutter system into a foundation problem, and most of them are easy to avoid once you know what to look for.
Most drainage complaints trace back to one of four fixable errors, and none of them require tearing out the whole system to correct.
Pro Tip: If a downspout looks slightly twisted or strains against its straps, that’s usually a sign the offset was estimated instead of measured. It’s a five-minute fix now, or a replaced section after the next windstorm.
Before you touch a hole saw, walk the roof and map where water actually collects during a rain. Measure each gutter run’s length, note the existing grade around the foundation, and mark your intended outlet spot with chalk.
For the work itself, you’ll want a hole saw or outlet punch sized to your downspout, matching downspout sections and elbows, hanging straps or brackets, gutter sealant, a splash block or flexible extension, a 4 foot level, and a tape measure.
Never lean a ladder against a gutter section itself, and always have a second person spot you when working above 10 feet.
Downspout placement and landscaping design work against each other more often than homeowners expect. A downspout that dumps directly onto mulch or bare soil will carve a small ravine within a few heavy storms, especially on any kind of slope. That erosion channel then carries mulch, topsoil, and sometimes plants themselves downhill with every rain.
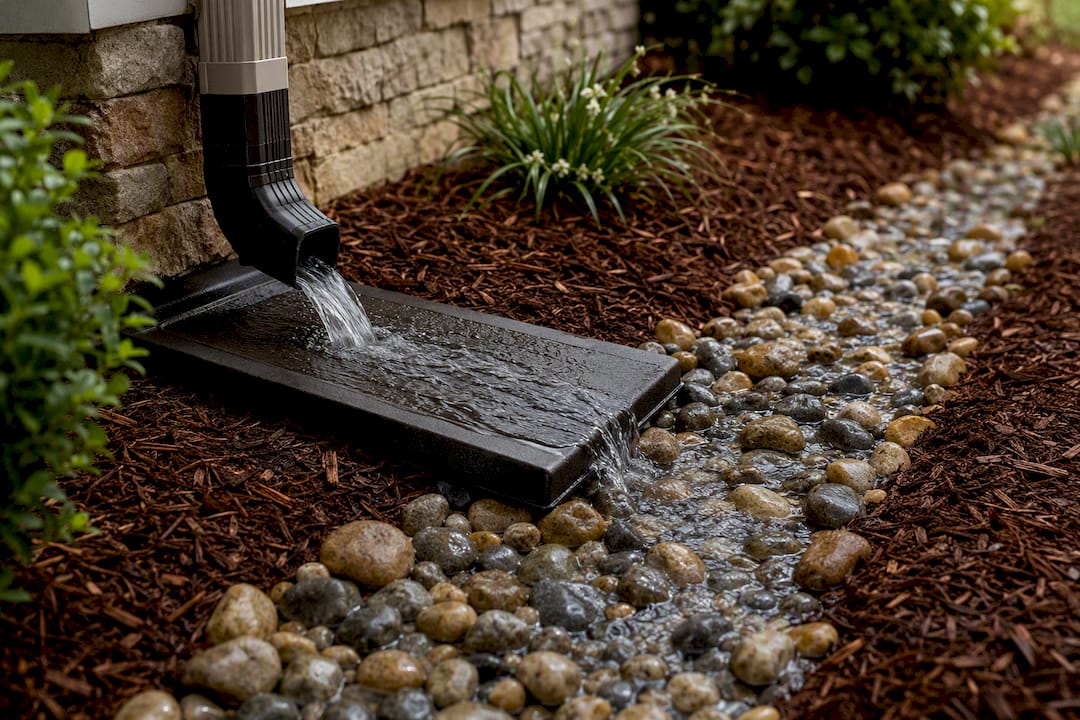
The fix is rarely to move the downspout. It’s to control what happens at the discharge point. A splash block spreads the water’s force across a wider area instead of concentrating it into one narrow stream, which is often enough on flat, well-planted ground. On a slope, river rock or a dry creek bed along the discharge path absorbs the energy of the water and slows it down before it reaches lower ground.
Planting beds directly under a downspout’s discharge path also struggle for a different reason: they get flooded during storms and then dry out completely between rains, which is hard on most ornamental plants. Positioning beds a few feet to the side of the discharge zone, with the water routed through a gravel channel or buried line past the bed entirely, keeps both the landscaping and the drainage working the way they’re supposed to.
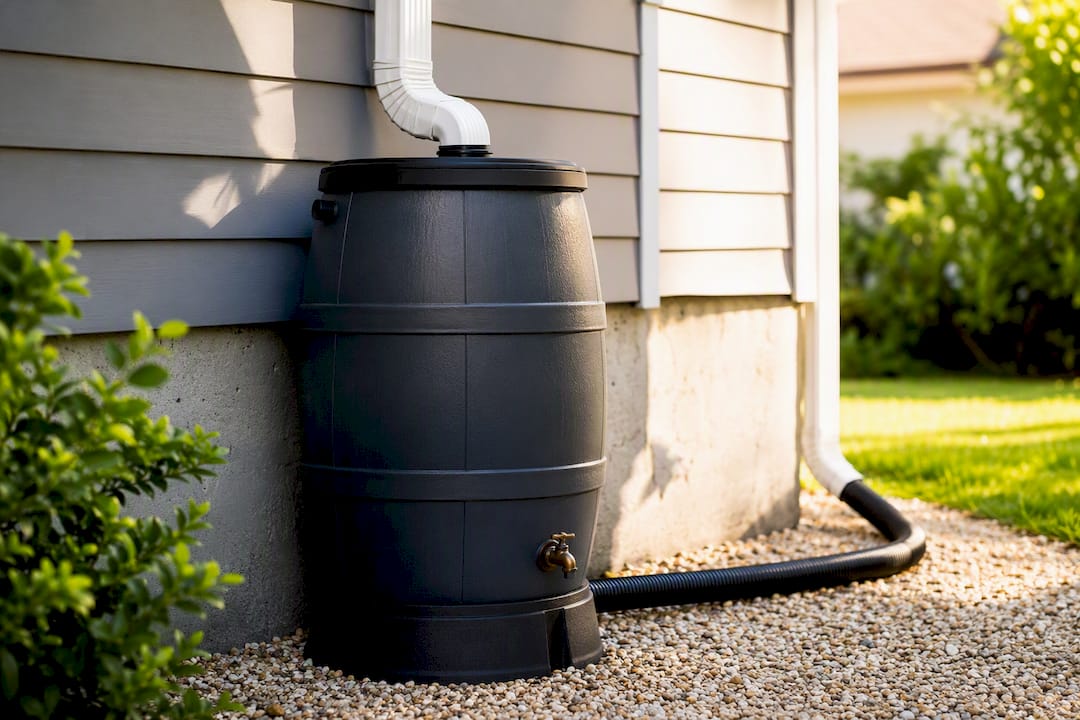
Downspouts are the natural entry point for any rainwater harvesting setup, since they already collect and concentrate the roof’s runoff at a single spot. Diverting that flow into a rain barrel or cistern instead of the ground means less water needs to travel across the yard at all, which can ease pressure on discharge lines and erosion-prone areas nearby.
The placement rules don’t change much when you add a barrel to the system. You still want the outlet at a low point with proper slope feeding it, and you still need an overflow path for storms that fill the barrel faster than you can use the water. That overflow typically routes through a diverter back into a standard downspout extension or buried line, following the same 4 to 6 foot minimum discharge distance from the foundation.
One placement detail specific to harvesting setups: the barrel or cistern needs a stable, level base close enough to the downspout that you’re not adding extra elbows and bends that slow the fill rate. A downspout at an accessible corner, rather than one buried behind dense landscaping, makes a harvesting system far easier to install and maintain over the life of the barrel.
Many municipalities regulate where downspouts can discharge, particularly around property lines, sidewalks, and stormwater systems, since runoff crossing onto a neighbor’s lot is a common source of disputes. Some jurisdictions require that discharge stay entirely on the property it originates from, while others prohibit connecting downspouts directly into a sanitary sewer line, a practice that overwhelms treatment systems during heavy storms.
Homeowners’ associations and coastal counties sometimes add their own layer of requirements on top of general building code, covering things like exterior color matching, minimum discharge distance onto shared drainage easements, or hurricane strapping standards for the downspout itself in wind-prone regions. Before you cut into a fascia board or run a buried lateral toward a property line, check with your local building department. A five-minute call can save you from redoing work that violates a setback rule you didn’t know existed.
Most drainage guides treat every yard like it drains the same way, and that’s the biggest gap between generic advice and what actually works. A lot with clay soil fifty feet from a lot with sandy loam can need two completely different discharge strategies, even with an identical roof and gutter layout.
The building-science numbers, spacing, slope, discharge distance, hold up as reliable defaults. Where experience actually earns its keep is in reading a specific grade, soil type, and existing erosion pattern, then deciding whether a splash block is genuinely enough or whether that lot needs buried pipe from day one. Top Florida Roofing’s crews work Miami-area drainage conditions daily, offer free same-day inspections, back installations with a 7-Year Elite Craftsmanship Warranty, and carry GAF certification, claims the company makes about its own work, not universal guarantees. That kind of repeated exposure to one region’s soil and storm patterns is what turns a correct rule of thumb into a placement decision that actually holds up over years, not just the first season.
— Rafael
Getting the numbers right on paper is one thing. Getting a crew to cut a clean outlet, pitch a 40 foot run correctly, and bury a lateral line without hitting your irrigation is another. Top Florida Roofing installs seamless aluminum and copper gutter systems sized and pitched to the rules covered above, along with repair work, buried lateral installs, and full drainage inspections for homes across Miami-Dade, Broward, and Palm Beach counties.
The company states it can dispatch a crew for urgent drainage or storm issues as part of its 24/7 emergency service, and it backs its installation work with a warranty and certification, claims made by the company about its own service standards. If your gutters are overflowing, pooling at the foundation, or you’re just not sure your current outlet spacing is doing its job, request a free inspection through the gutters and drainage page and get a specific answer instead of a guess.
The core numbers in this guide come from a handful of sources worth bookmarking. The Building America Solution Center covers slope and discharge distance guidance in technical detail. This Old House offers homeowner-friendly explanations of the same spacing rules. For sizing math and common installation mistakes, The Roofing Brief’s placement and sizing guide breaks down the calculations step by step.
Space downspouts roughly every 30 to 40 feet of gutter run, a standard confirmed by multiple contractor sources. Runs longer than 40 feet, or roofs with complex valleys concentrating extra runoff, typically need an added outlet even on shorter sections.
Discharge water at least 4 to 6 feet from the foundation as a baseline, per Building America Solution Center guidance. Extend that to 8 to 10 feet if your soil is clay-heavy, poorly graded, or your home has a basement.
Gutters need about a quarter inch of drop for every 10 feet of run toward the downspout outlet, based on Building America’s high-performance gutter case study. Some installers work in 1/16 to 1/8 inch per foot instead, which lands in the same practical range.
Use roughly 1 square inch of downspout cross-section for every 100 square feet of roof area draining into that outlet. A standard 2x3 inch downspout typically handles up to about 600 square feet, while a 3x4 inch downspout handles closer to 1,200 square feet.
The company installs seamless aluminum, oversized aluminum, and copper gutter systems, along with repairs and buried drainage lines. Current pricing and service details are listed on the gutter services page.