Homeowners: Fix Missing Shingles in 48 Hours, Safety and Insurance
Fix a missing shingle yourself only when the damage is isolated, one to three shingles, the decking underneath is solid, the roof slope is walkable, and you can work safely off a ladder. If you see exposed decking, an active leak, storm damage, or more than a handful of missing shingles, skip the patch and call a licensed roofer within 24 to 48 hours. Waiting longer turns a $150 fix into a ceiling replacement, and working a steep or wet roof alone is where most DIY repairs go wrong.
TL;DR: If more than three to five shingles are missing or damage is widespread, professional repair is urgent, especially after storm or high wind events. Replacing a single shingle requires warm weather above 50°F and proper sealant, nails, and inspection to ensure a durable, waterproof fix. In case of active leaks, exposed decking, or storm damage, immediate tarping by professionals can prevent extensive water intrusion and further structural harm. DIY repair risks damaging surrounding shingles, misplacing nails, and overlooking hidden damage, which can lead to higher costs or insurance claim issues. Regular inspections, gutter maintenance, and trimming branches help prevent future shingle loss and long-term roof deterioration.
TL;DR:
Start by counting. Walk the perimeter of your house and look up, then check from a window or with binoculars for shingles missing near the ridge, in valleys, or around chimneys and vents. Anything more than three to five shingles missing in one area, or damage spread across multiple slopes, points toward a professional job rather than a weekend patch.
Next, go into the attic. Daylight coming through the roof deck, dark water stains on the rafters, or damp insulation all mean water has already gotten past the shingle layer. Press on any exposed decking you can safely reach. Soft, spongy wood means rot has set in, and that has to be repaired before any new shingle goes down, according to roofing inspection guidance from Lifetime Xteriors.
Call a professional immediately if you notice any of these:
If your damage checks out as isolated and the roof is safe to walk, a single shingle swap is one of the more approachable roofing jobs. Pick a day above 50°F. Cold shingles turn brittle and crack the moment you lift them, which is why roofers avoid winter patch jobs whenever possible. Bring a spare or matching shingle, a flat pry bar, roofing cement, and a helper who can hold the ladder and watch from the ground.
Pro Tip: Nail placement matters more than most homeowners expect. Fasteners set too high catch only one layer of shingle and pull loose in the next windstorm; fasteners set too low leave the heads exposed to weather and start a new leak right where you just fixed one, a mistake flagged in HomeAdvisor’s roofing cost research.
Once the shingle is set, run a hose over the repair for several minutes while someone watches the attic from below for drips, a verification method GAF recommends before calling a repair finished. Recheck the spot after the next two or three rain events. If your roof is under a manufacturer or workmanship warranty, confirm the fine print first. Some warranties are voided by unlicensed repair work, and an insurer may deny a related claim later if they discover DIY patchwork on storm-related damage.
If exposed decking or an active leak means you can’t wait for a full repair, get a cover on the roof the same day, even if the permanent fix comes later. Professional tarping crews anchor heavy-duty tarps with battens screwed into the roof structure at the edges, which keeps wind from getting underneath and ripping the whole thing off overnight. A DIY tarp or sheet of plastic held down with a few bricks rarely survives the first real gust and can do more harm by trapping moisture against the deck.
DIY tarp materials generally run $25 to $150, while professional emergency tarping and securing typically costs $200 to $800, depending on roof size, pitch, and how many penetrations the crew has to work around, per cost data compiled by Angi. A steep or heavily penetrated roof pushes toward the higher end because it takes longer to anchor safely, according to Dane Roofing’s emergency repair guidance.
Gather everything before you climb, not after. You’ll want a flat pry bar, a hammer, 1¼ inch galvanized roofing nails, cap nails for any underlayment patch, roofing cement, a utility knife, chalk for marking nailing lines, and one or two replacement shingles that match your existing pattern.
Ladder falls are one of the most common home injury causes in the country, and the CDC’s ladder safety data documents hundreds of thousands of ladder-related injuries treated annually. Roof work multiplies that risk because you’re moving on an angled, often slippery surface after you get off the ladder.
Stop and call a professional if any of these apply:
Bring a piece of your old shingle, not just a photo, when shopping for a match. Asphalt shingle color and granule blends shift between manufacturing runs, and if your roof is more than 10 years old, an exact match is often impossible because that product line has likely been discontinued or reformulated, a pattern This Old House has documented repeatedly in its repair coverage. Placing the closest match on a rear-facing or less visible slope minimizes how noticeable the patch is.
DIY materials for a one- to three-shingle repair typically run $25 to $150 total.
Professional service calls for one to five missing shingles generally cost $150 to $450, based on the pricing data referenced in CDC ladder safety research on home repair risk alongside industry cost guides.
Most roofers carry a minimum service call fee regardless of job size, since a truck roll and ladder setup cost the same whether they replace one shingle or five.
If decking underneath turns out to be rotted, expect the price to climb well past the shingle-only estimate, since deck repair adds labor and material the original quote didn’t include.
If wind, hail, or a storm caused the damage, photograph everything before you touch a single shingle. Take wide shots of the roof from the ground, close-ups of the missing area, and photos of any neighborhood context that shows the storm’s path, dated the same day if possible. Photograph attic damage too, including any daylight or staining, since adjusters weigh interior evidence heavily.
Working with a contractor who offers insurance claim assistance before repairs begin often makes the difference between a smooth claim and a denied one.
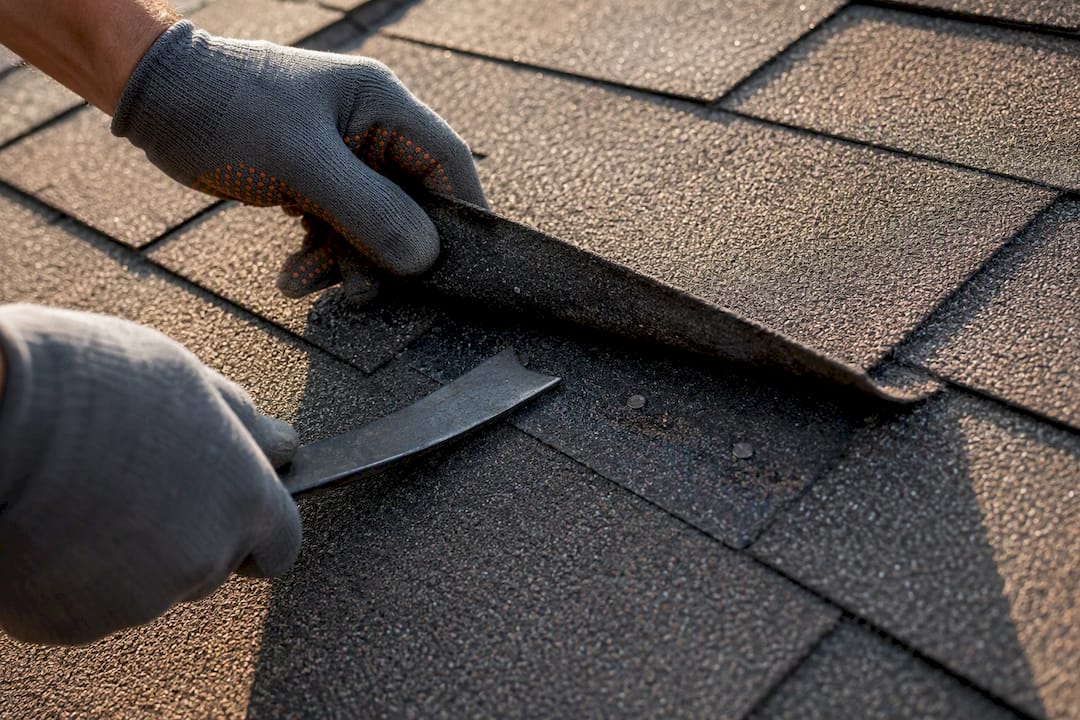
Removing a damaged shingle is where most DIY repairs cause collateral damage, because the adhesive seal between shingle courses is stronger than people expect. Yanking a shingle out without breaking that seal first often tears the shingle above it or cracks the one below, turning a one-shingle problem into a three-shingle problem.
Work from the top down. Use the pry bar to lift the sealed tab of the shingle directly above your target, sliding it just far enough to expose the nail heads without bending the shingle sharply, especially in cooler weather when the material is stiffer. Pop each nail with the flat edge of the bar rather than yanking, since a nail pulled sideways can widen the hole in the decking underneath.
Once the damaged shingle is loose, check for any nail fragments or shingle granules left behind in the gap. A stray nail point left standing will puncture the replacement shingle the moment you nail it down, creating a hidden leak that won’t show up until the next hard rain. Clear the area completely with a gloved hand before sliding the new shingle in.
If the underlayment beneath the missing shingle is torn, patch it with a small piece of matching underlayment and cap nails rather than relying on roofing cement alone. Cement bridges gaps temporarily, but it degrades faster than a proper mechanical patch, particularly under Florida’s UV exposure. Work methodically, one course at a time, and resist the urge to pry multiple shingles loose at once. Isolating each repair to a single course keeps the surrounding roof intact and limits how much you have to reseal afterward.
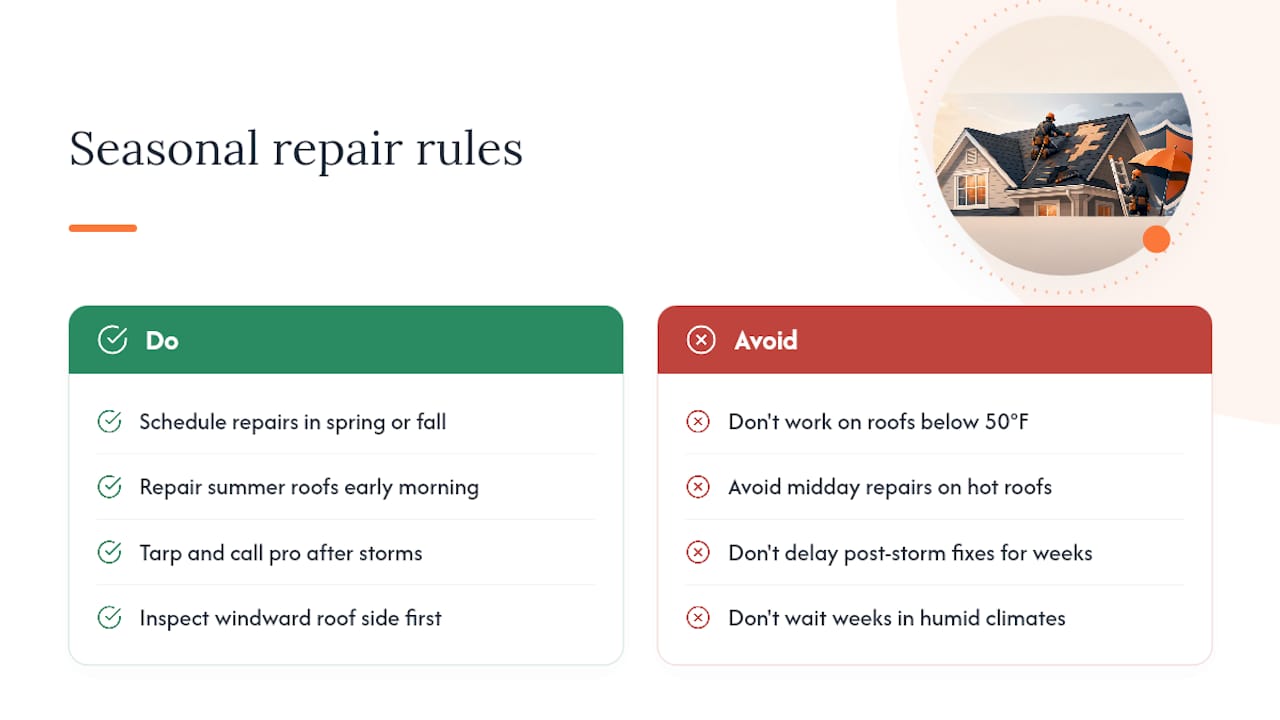
Temperature changes how asphalt shingles behave more than most homeowners realize. Below 50°F, shingles lose flexibility and crack rather than bend when you lift them, which is why roofers generally avoid non-emergency patch work in cold snaps. If you’re in a climate with real winters, plan routine shingle repairs for spring or fall when the material is pliable enough to lift and reseal cleanly.
Heat brings a different problem. On very hot days, shingles soften and the granule surface can scuff or scratch under foot traffic, and the adhesive strips seal almost instantly once repositioned, which makes small adjustments harder. Early morning, before the roof surface heats up, is the better window for summer repairs.
Storm season changes the calculation entirely. If missing shingles show up after a named storm or a severe wind event, the timing pressure shifts from “when is it comfortable to work” to “how fast can water intrusion be stopped.” A repair that would normally wait for a dry weekend needs a tarp and a professional inspection within days, not weeks, because saturated decking and wet insulation compound daily.
Humidity plays a quieter role. In consistently humid regions, a torn or missing shingle that goes unaddressed for even a few weeks can let enough moisture into the attic to start mold growth in insulation, a slower but equally costly form of damage than a single dramatic leak. Wind direction during a given storm also determines where you should focus your inspection first, since shingles tend to lift on the side that took the direct gust rather than uniformly across the whole roof.
Roofing repairs aren’t purely a materials question. Local building codes often dictate what counts as a repair versus what triggers a full permit and inspection, and that threshold varies by jurisdiction. Some municipalities allow like-for-like shingle replacement without a permit, while others require one once the repaired area crosses a certain percentage of the total roof surface.
Wind zone matters even more in storm-prone regions. Coastal and hurricane-exposed areas frequently mandate specific nailing patterns, wind ratings, or fastener counts that exceed what a bargain box of shingles from a hardware store meets by default. Using generic replacement shingles in a high-wind-zone repair can leave the patch more vulnerable than the surrounding roof, undermining the very repair you just made.
Homeowners’ associations add another layer many people overlook. Some HOAs specify approved shingle colors, brands, or profiles, and a mismatched patch, however well executed, can trigger a compliance notice regardless of how sound the repair is structurally.
Before starting any repair beyond a single isolated shingle, check with your local building department or HOA about whether a permit or approval is needed. A licensed roofing contractor already knows the local code requirements and wind-rating rules for your area, which is one more reason multi-shingle or storm-related repairs are better handled by a professional than a DIY attempt.
A missing shingle is rarely a random event. It’s usually a symptom of an aging seal strip, wind exposure that exceeds the shingle’s rating, or a repair from years ago that wasn’t nailed correctly. Preventing the next one means addressing the underlying cause, not just replacing what blew off.
Start with an annual visual inspection, ideally after storm season and again in spring. Look for curling edges, granule loss collecting in gutters, and any shingles that look raised or loose even if none are fully missing yet. Catching a lifting shingle before it disappears entirely costs a fraction of an emergency tarp job later.
Keep gutters clear. Clogged gutters back water up under the shingle courses at the roof edge, which weakens the adhesive seal over time and makes edge shingles the first to go in the next windstorm. If your gutters are undersized or poorly pitched, upgrading to a properly sloped system reduces that risk considerably.
Trim overhanging branches. Limbs that scrape the roof surface during wind events wear down granules and can physically knock shingles loose, especially older, more brittle ones. Finally, consider a scheduled maintenance visit rather than waiting for visible problems. A structured inspection program catches lifted nails, worn flashing, and early sealant failure long before they turn into a missing-shingle emergency, and it costs far less than reactive storm repairs over the life of a roof.
Most missing-shingle guides treat DIY repair and professional service as equally valid paths that just differ in cost. They aren’t. The real dividing line isn’t skill, it’s exposure. A homeowner with reasonable hand tools can absolutely nail in a replacement shingle correctly. What they can’t always judge accurately is what’s happening underneath that shingle, or how much risk they’re accepting by being on a roof at all.
The ladder statistic gets treated as a throwaway line in most articles, but it’s the most important number here. Hundreds of thousands of ladder injuries happen every year in home settings, and roof work is exactly the kind of task that pushes people past their comfort level on a ladder they don’t use often. That’s not a reason to avoid every repair. It’s a reason to be honest about when the job has quietly become bigger than “replace one shingle.”
The insurance angle gets underweighted too. Homeowners who patch storm damage themselves before documentation happen to save a repair call but frequently lose leverage on a claim that could have covered far more than the patch itself. A contractor inspection isn’t just about getting the repair done right; it’s about creating the paper trail an adjuster actually trusts.
— Rafael
If your inspection turned up exposed decking, an active leak, storm damage, or more shingles missing than you’re comfortable counting on one hand, that’s exactly the gap Top Florida Roofing exists to close. The team has completed thousands of roofing projects across South Florida, backed by industry certifications and a workmanship warranty on completed work.
A same-day inspection, sometimes including drone imagery, can help determine quickly whether the repair needed is minor or more extensive. If the damage came from a storm, emergency tarping and securing gets a crew on-site fast, often within two hours, to stop water intrusion before it reaches your attic, and the same visit produces the documentation an insurance adjuster expects to see. For repairs that don’t need a full tarp, targeted shingle and roof repair services cover everything from a handful of missing shingles to flashing and flat roof patches, with insurance claim support built into the process from the first inspection. If you’d rather not find out the hard way whether your damage is a weekend project or a bigger problem, call for the free inspection and get a straight answer before you touch a ladder.
A roof with one or two missing shingles and no exposed decking can often hold for a few weeks in mild, dry weather without serious harm. Once decking is exposed or rain is in the forecast, the safe window shrinks to 24 to 48 hours before water starts reaching the attic and framing.
A heavy-duty tarp anchored with furring strips at the ridge and edges, not just weighted down, is the most reliable short-term cover. DIY materials for this typically cost $25 to $150, while professional emergency tarping runs $200 to $800 depending on roof size and pitch.
A single missing shingle on a low-slope roof with sound decking is usually a minor, fixable issue rather than an emergency. It still needs attention within a couple of weeks, though, since exposed underlayment degrades faster under sun and rain than an intact shingle layer does.
The underlayment beneath the missing shingle is exposed directly to UV rays and water, and it wears out far faster than shingles designed for that exposure. Left unaddressed, this typically leads to underlayment failure, deck rot, and eventually interior leaks and insulation damage.
Pricing depends on the scope of the damage, and current rates are listed on the residential repair services page. A free same-day inspection determines the exact repair needed before any cost is quoted.
Written with BabyLoveGrowth’s technology