Seal Air Leaks First: Roof Ventilation Fixes for Homeowners
If your attic feels like an oven, your shingles are curling early, or you’re seeing dark streaks on the plywood, you’re almost certainly dealing with a roof ventilation problem, not a mystery leak. The fix almost always starts the same way: check whether your soffit intake is blocked and whether conditioned air is leaking into the attic, and seal those gaps before you even think about adding vents. Grab a flashlight, snap a few photos of any staining, and hold off on buying anything until you’ve confirmed what’s actually happening up there.
TL;DR: Proper attic ventilation requires clearing soffit vents of debris and ensuring balanced intake and exhaust to prevent moisture buildup and shingle damage. Common causes of failure include blocked soffit intake, mixed vent types causing short-circuiting, and leaks from fixtures or gaps that bypass the ventilation system. Effective DIY fixes focus on air sealing bypasses and installing rafter baffles, while roof work like flashing repairs must be handled by professionals. A professional inspection costs between $150 and $250 and helps identify issues before damage or mold develop, especially if roof decking or shingles are involved. Seasonal maintenance like gutter cleaning, vent clearing, and checking baffles can prevent costly issues, but significant repairs should follow a structured, professional assessment.
TL;DR:
Poor attic ventilation shows up in two places: inside the attic and on the roof surface itself. Inside, you’re looking for moisture beads or frost on the underside of the roof deck in winter, rusted nail tips poking through the sheathing, dark mold staining on rafters, and insulation that feels damp or matted. Outside, curled or cracked shingle edges, dark streaking, and ice dams along the eaves in cold months all point back to trapped heat and moisture rather than storm damage.
There’s a real difference between condensation and an active leak worth knowing before you call anyone. Condensation tends to spread out in a diffuse pattern, often near ridges or high points where warm, moist air collects and cools against the deck. A leak usually traces a defined trail from a specific point, like a nail hole, flashing seam, or vent boot, straight down to a stain below it.
Comfort and energy bills are ventilation tells too. According to GAF’s homeowner guidance, excessive attic heat, visible moisture on the plywood, mold or mildew smell, rusted fasteners, and curled shingles are the clearest homeowner-observable signs of a failing system.
Pro Tip: Take a photo of any staining with a tape measure or coin next to it for scale. If a contractor visits later, that single image saves them (and you) a lot of back-and-forth.
Most ventilation trouble traces back to one of four installation mistakes, and they’re rarely obvious from the ground.
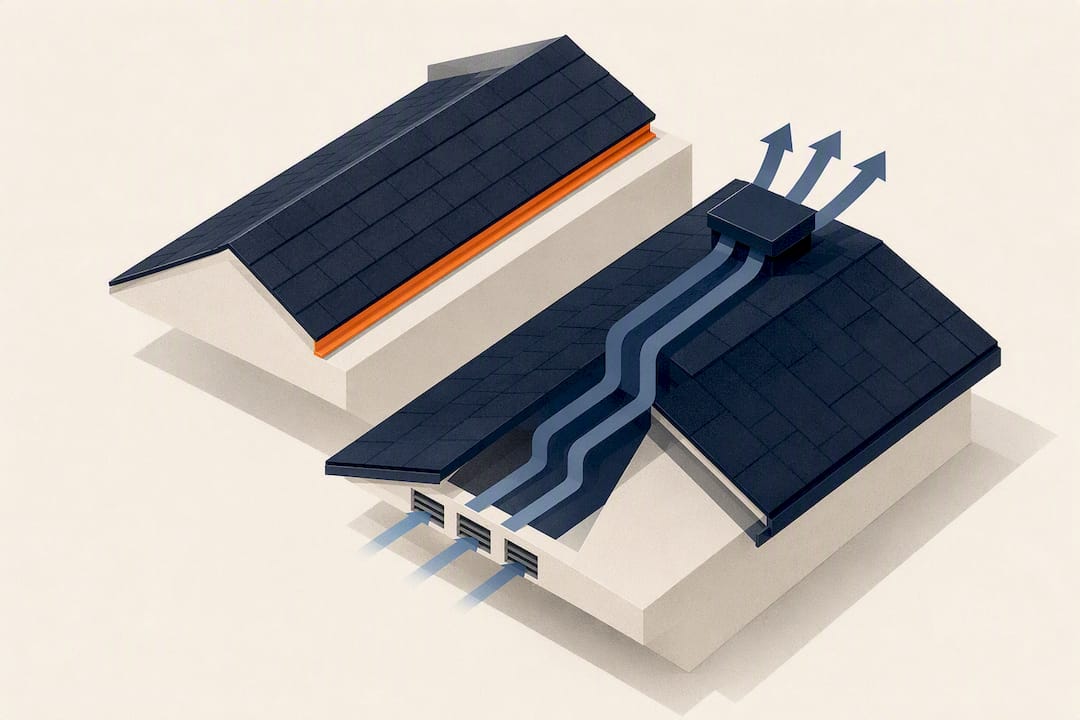
Blocked soffit intake is the most frequent culprit. Insulation pushed too far into the eaves, or years of leaves and debris, chokes off the low-intake air your system depends on. Without intake, exhaust vents at the ridge just pull air from wherever they can find it, often straight from your living space.
Unbalanced intake and exhaust is the second issue. Mixing ridge vents with gable vents or box vents on the same attic causes short-circuiting, where air takes the shortest path between two exhaust points and never actually pulls fresh air up from the soffits. Building Science’s BSD-102 guidance recommends one exhaust strategy per attic, not several competing ones.
Air leakage from below matters just as much. Recessed lights, an unsealed attic hatch, and gaps around ductwork all let warm, humid house air bypass into the attic, where it condenses on the cold deck. And sometimes it isn’t ventilation at all: a bathroom fan vented straight into the attic instead of outside, or a cracked flashing seal, can mimic every symptom on this list.
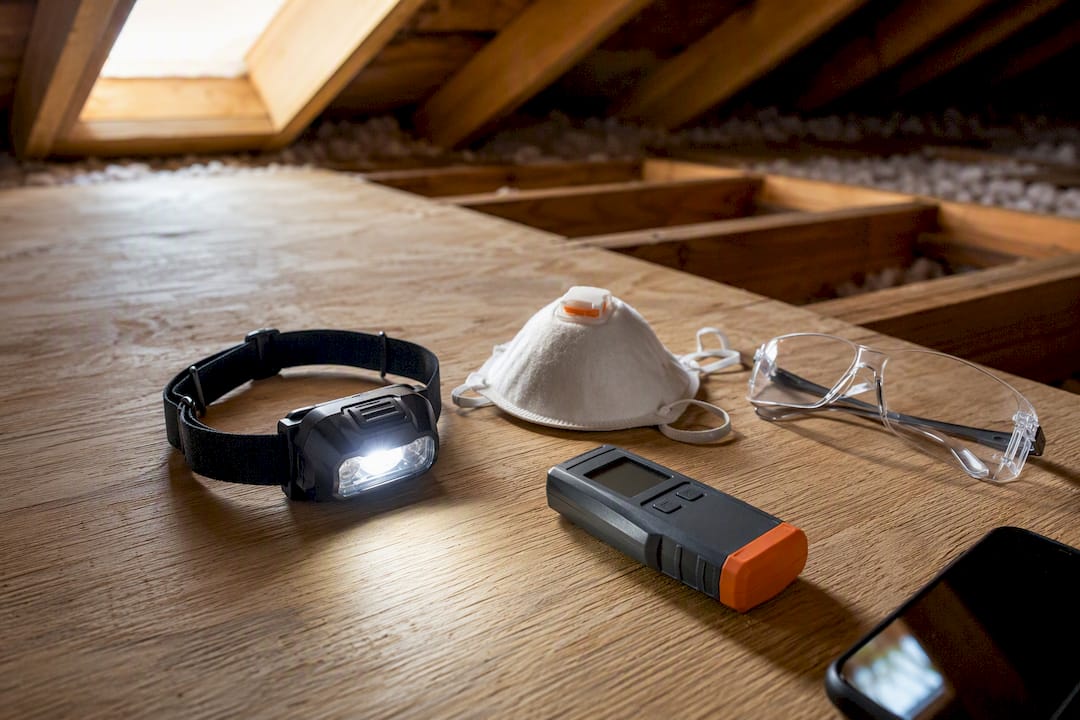
Before you climb up, put on a dust mask, safety glasses, and a headlamp, and bring a flashlight, a moisture meter or simple probe, and your phone camera. Step only on the joists or a plywood walk board, never directly on insulation, since drywall underneath won’t hold your weight.
Air sealing comes first, before anything involving vents. StructureTech’s inspection findings note that sealing bypasses like recessed lights, hatches, and duct penetrations usually does more for moisture control than adding vent area ever will, because ventilation can’t outpace a steady leak of humid house air.
Once bypasses are sealed, restore your intake. Clear soffit vents of insulation and debris, and confirm your attic follows the standard 1:300 net free ventilating area rule (1 square foot of vent area for every 300 square feet of attic floor), or 1:150 in attics without a vapor barrier, per Building Science’s BSD-102. Intake and exhaust should be roughly balanced, split between low soffit vents and high ridge or roof vents.
Installing rafter baffles is the cheapest fix that solves the most problems. They hold a 2-inch air channel open above the insulation at the eaves, per Building America’s air sealing guideline, and they typically cost very little compared to any roof work.
Cutting a new ridge slot or adding exhaust vents is a roofing job, not a weekend project. It involves opening the roof deck and re-flashing, which is why it belongs to a licensed contractor.
Pro Tip: Skip powered attic fans unless a contractor has confirmed your attic is airtight from the house side. They can depressurize the attic, pull conditioned air (and money) straight out of your living space, and in homes with gas appliances, they can even pull combustion fumes backward into the house.
Some findings mean stop the DIY inspection and call someone. Soft or sagging decking, active water intrusion, exposed or damaged wiring, and mold covering more than a small patch all qualify. The CDC’s mold guidance is blunt on this point: ventilation alone won’t remove mold once it’s established, since the moisture source has to be eliminated first.
A qualified inspection should document your current vent area according to the 1:300 or 1:150 standard, identify air-sealing needs, map any moisture staining, and check overall roof integrity. Repairs typically follow a sequence: seal bypasses, restore intake, then address any flashing or shingle damage that surfaced during inspection, followed by a return visit to verify airflow improved.
Cost drivers include attic size, how much existing insulation has to be moved or replaced, how many vent types need correcting, and whether roof decking needs repair. Ask for an itemized, prioritized plan rather than a single lump number, so you can see what’s urgent versus what can wait.
A few recurring checks keep small ventilation issues from becoming expensive roof problems. Do these once a year, ideally in spring and again before winter.
Adding insulation without checking the eaves first is one of the most common ways homeowners accidentally block their own intake vents.
A handful of ventilation fixes are genuinely DIY friendly, and a handful are not, and the price gap between the two is wide enough that it’s worth knowing which category your problem falls into before you start.
Clearing soffit vents of debris and adding rafter baffles are the cheapest interventions, often requiring only baffles, a staple gun, and a free Saturday. Sealing obvious bypasses like an attic hatch or gaps around a bathroom fan housing is also within reach for most homeowners with basic caulk and expanding foam. These jobs run more in time than money.
Anything involving the roof surface itself changes the math. Flashing repair around a chimney, skylight, or vent typically runs $250 to $900 depending on the number of penetrations and the material involved. Individual tile repairs run $15 to $45 per tile, and a flat roof patch on a TPO or modified bitumen section runs $300 to $1,500 depending on the size and severity of the damage.
A professional general inspection that documents your vent ratios, air-sealing gaps, and roof condition runs $150 to $250 standalone, or $150 to $250 for a 4-point insurance inspection, and $175 to $275 for a wind mitigation inspection. Those numbers are worth it if you’re weighing an insurance claim or preparing to sell, since a documented inspection carries more weight than a homeowner’s photos.
The honest rule of thumb: if the fix stays inside the attic and doesn’t touch shingles, decking, or flashing, it’s usually a fair DIY candidate. Once the roof surface is involved, professional labor and material costs take over.
You don’t need a contractor’s toolbox to do a proper inspection, but a few specific items make the difference between guessing and actually knowing what’s wrong.
For the inspection itself: a bright headlamp or flashlight, a dust mask rated for fine particulate, safety glasses, and a plywood walk board or knee board to distribute your weight across joists. A basic moisture meter, the kind sold at most hardware stores for under $30, tells you definitively whether that dark stain on the sheathing is currently wet or just an old mark from a resolved problem. Your phone camera covers documentation.
For the fixes themselves: rafter baffles (sold in multi-packs and sized to standard rafter spacing), a staple gun to secure them, and a utility knife to trim them to fit irregular bays. Expanding spray foam and caulk handle most air-sealing bypasses around the attic hatch, plumbing stacks, and wiring penetrations. A stiff wire brush or shop vacuum with a hose attachment clears blocked soffit screens from inside the attic without having to work from a ladder outside.
Leave specialty tools like a thermal imaging camera or a blower door test to a professional. They’re expensive to own for a once-a-decade job and take training to interpret correctly. If your inspection turns up something beyond baffles and caulk, that’s the point where a contractor’s equipment starts paying for itself.
Ventilation calls typically begin by prioritizing air sealing, then restoring intake, followed by vent corrections, and roof repairs only when decking or shingles are damaged. Initial visits often include a free same-day inspection, with some services offering a workmanship warranty and emergency response options. This sequence is important because replacing vents without fixing air leaks often does not resolve the issue.
— Rafael
There’s a real cost to guessing on this one: seal the wrong gap, add a vent you didn’t need, and you’re still stuck with the mold or the ice dams next winter. Topfloridaroofing’s advantage here is sequencing, not just labor. Every visit starts with a free same-day inspection that documents your actual vent ratio, air-sealing gaps, and roof condition before anyone touches a shingle, so you’re paying for the fix your attic needs and nothing extra.
If the inspection turns up flashing issues or tile damage alongside the ventilation problem, that gets flagged in the same visit instead of a second appointment later. Backed by a 7-Year Elite Craftsmanship Warranty and 24/7 emergency dispatch, the goal is one accurate diagnosis, not a string of return trips. Schedule your free inspection through the roof inspection page and get a prioritized, itemized plan before you spend a dollar on repairs.
The most common problems are blocked soffit intake, mismatched exhaust vent types causing short-circuiting, and vents painted or sealed shut during a past renovation. Rafter baffles missing after an insulation top-up cause a similar effect by cutting off the airflow path entirely.
Balance is what matters most: continuous soffit intake paired with a single exhaust strategy, sized to roughly 1 square foot of vent area per 300 square feet of attic floor. Sealing air leaks from the living space below usually does more good than adding vent area alone.
Properly designed ridge and soffit vents are built with baffles or louvers that block wind-driven rain under normal conditions. Water intrusion around a vent almost always points to failed flashing or a cracked vent cap rather than the vent design itself.
Look for excessive attic heat, moisture or frost on the underside of the roof deck, rusted nail tips, mold staining, and curled or cracked shingles, all of which GAF lists as homeowner-observable red flags. Ice dams along the eaves in winter are another strong signal.
A standalone inspection that documents your vent ratios and air-sealing needs runs $150 to $250. From there, flashing repairs run $250 to $900 and flat roof patches run $300 to $1,500, depending on what the inspection finds.